Author Archive

[Review] Lara Croft : Tomb Raider 2013

Saturday, June 21st, 2014

Camilla-Luddington-Named-New-Voice-of-Lara-Croft-Banner-614x239

Lara Croft : Tomb Raider 2013

We have all seen Lara Croft as an extraordinary adventurer rivalled only by Indiana Jones but never like this. This game depicts Lara on her first ever expedition to discover the lost island of Yamatai. She is nothing more than an academic with no field experience. The game lets us witness Laura as she is stabbed, pounded, shot, suspended upside down and thrown off cliffs as she transforms from naive archaeologist to merciless killer.

Pros+
Builds up Lara from scratch.
Amazing settings and visuals.
Wide array of puzzles.
Good controls.

Cons-
Multiplayer is very lackluster.
Somewhat predictable story.

Gameplay:
The gameplay was top notch. Varying from mountain climbing, running through forests, underground caverns, and so on. The Quick Time Events also were a refreshing change from the ordinary events. Fail any of those Quick Time events and you’ll end up crushed, dragged, mauled or killed in any other way.
Lara’s Survival instinct mode also helps you move along the game by highlighting important aspects such as wolf tracks, salvage, and doors which you have to open.

There are endless customization options and they allow you to modify your gear with the salvage you’ve found. Hunting for salvage is a nice distraction in itself.

Graphics:
The graphics were amazing. The splendid changes from open jungle to underground cave to brick buildings is awesome. The world is huge with endless number of caves to explore and tombs to raid. You are after all the tomb raider.

Controls:
The controls were perfect. Running away from enemies, sneaking up to them and killing them were all a pleasure due to the very responsive controls which do exactly what you tell them to.

Gun controls were a tiny bit unpolished but they were extremely minor niggles in an otherwise perfect game. Nothing to deter you from trying this game out for yourself.

The Verdict:
Lara Croft : Tomb Raider is a reboot which lives up to the name of the previous games. It combines breathtaking visuals and diverse landscapes with pinpoint controls and an engaging story line to bring to you a Lara Croft which you have never seen before.

The only downside is the multiplayer part which frankly does not live up to the singleplayer campaign.

A MUST play.

[TUTORIAL] Making a Platforming game with GameMaker Lite Part I

Wednesday, May 28th, 2014

So you want to make a platforming game using Game Maker Lite, huh? Well, you have come to the right place as this is a in depth tutorial on making a Platforming engine, and then expanding upon it, all with GameMaker Lite.

Warning : Some Coding required.

If you want to make a Platforming game without Coding in the GML Language then stay tuned for my Beginners Tutorial for GameMaker.

First of all we need to have a basic idea of what we want our game to be like when it is finished. For simplicity’s sake I will be making a clone of the popular DOS game “Dave” albeit with different sounds, graphics and animations.

To finish and understand this tutorial you will need a basic understanding of scripting and of course the GameMaker Lite software. If you don’t have the GameMaker Lite software you can refer to my tutorial on downloading and installing it.

First of all we will make a new GameMaker File.
To do this we Click on File > New.

Once we have done this we can start importing our sprites.Sprites are the basic pictures and animations our game will have. If we want to add a new image for our character we do it here, if we want our enemy to have a different image we do it here.

For simplicity’s sake I will only be using Sprites and sounds available with the download of GameMaker.
We start by importing one sprite each for the Left and right walking animations of our Character (ie. The main protagonist of out game).Name them Player_Left and Player_Right.

Note: Make sure the “Precise Collision Checking” box has been unchecked.
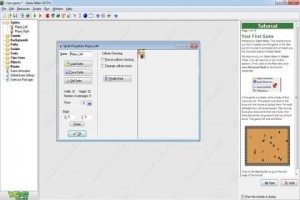
Player_Left

After making the sprites for our character we can start making a sprite for the platforms and walls our Character will stand on. Make a 16×16 pixel big sprite and call it Block.
This will be the boundary which will stop our character from falling off the level and also provide a platform for him to jump on.

These are the Basic Sprites we will need for our Platforming Engine. Expanding upon this by adding AI Enemies, Points system, Power ups and Multiple Levels will be the subject of future Tutorials.

Now that we have our sprites made we can start making our Objects. First we will be making our Player.

Click on “Create an Object”, name it “Player” and give it the Sprite “Player_Right”.
Now in the Events tab of your newly created “Player” object click on “Add Event” and click on “Create”. Now we can specify what we want to do as soon as our “Player” Object is created.
We will only be declaring the variables required for our basic movement in the “Create” event so in the “Control” tab to the right, Drag and Drop the “Execute Code” action to the Actions Box.
A new Text Box labelled “Execute Code” in it Paste this Code:

grav = 0;
vspd = 0;
hspd = 0;
dir = 0;

Now click on New Event>Step>Step
This will create a Step Event which will be executed in an unending loop.
Create another “Execute Code” Action inside the Step Event and Paste this Code in it.

if !place_meeting(x,y+1,Block) // if we are in the air
{
grav = .5; // set the gravity to .5
vspd += grav; // add .5 to our vspd once every step
}
else // else if we are on the ground
{
grav = 0; // set the gravity to 0
vspd = 0; // set vspd to 0 to stop moving
if keyboard_check_pressed(vk_up) // since we are on the ground, we can jump here, so check if we pressed up
{
vspd = -8; // set the vspd to -8, which will make us jump
}
}

if keyboard_check_released(vk_up) // if we released the up button while in the in air
{
vspd *= .5; // divide our vspd by 2, creating a smooth landing
}

if vspd > 8 // we don’t want to fall too fast, so lets limit our vspd
{
vspd = 8;
}

repeat(abs(vspd)) // we want to check for a collision every pixel, so we use a repeat() function to check every pixel while falling
{
if !place_meeting(x,y+sign(vspd),Block) // vspd can be negative or positive, so we check 1 pixel above or below, depending on which direction we are going
{
y += sign(vspd); // add to our y value 1 pixel at a time, letting use check for a collision every pixel
}
else // else if we hit a block
{
vspd = 0; // stop moving vertically
}
}

if keyboard_check(vk_right)== 1 //if We are pressing the Right Arrow Key
{
sprite_index = Player_Right
image_speed = 1
hspd=3;
dir = 1;
}

if keyboard_check_released(vk_right) // if we released the right button while walking right
{
hspd = 0;
dir = 1;
}

if keyboard_check(vk_left)== 1 //if We are pressing the Left Arrow Key
{
sprite_index = Player_Left
image_speed = 1
dir = 0;
hspd=-3;
}

if keyboard_check_released(vk_left) // if we released the left button while walking right
{
hspd=0;
dir = 0;
}

repeat(abs(hspd)) // same as the vspd, we want to check for a collision at every pixel we move
{
if !place_meeting(x+hspd,y,Block) // if there is no block to our left or right
{
x += hspd; // add to our x value depending on which way we are going
}
}

That finishes our “Player” character. New just Create a new object called “Block” and give it the 16×16 Block sprite we made earlier.

Now all we have to do is make our level. Click on “Create a room.” and place Block Objects wherever you want your player to be able to stand. I recommend placing them all around our level the making the platforms so that your player does not fall off the sides of the level. After you have done placing your Blocks, just place your Player object where you want him to spawn.
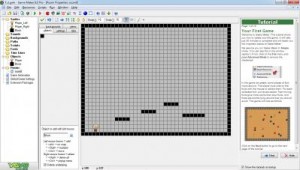
Room
That’s it! You have created your first Platforming game. Just click on “Run the game.” to try out your game.

Post your doubts in the comments section below.

Note: The code for the Player movement is well commented but if you would like it to be explained in more detail I will be making another tutorial where I will be explaining the scripts used here in detail.

For Part II of this tutorial, refer [TUTORIAL] Making a Platform game with GameMaker Lite Part II

Java Dictionary Application using JSON

Sunday, March 23rd, 2014

As an exercise, I tried creating a Java Dictionary Application. It started as a simple enough project but quickly snowballed into something larger than I expected. There were no offline dictionaries I could readily use, so I had to use an online one. But then I got the idea of extracting the meaning of each word from Google’s “define:” search function.

Some research revealed that it was possible using JSON. I also added Free TTS to pronounce the words out loud. It was an amazing learning experience. I met many roadblocks and had to improvise a lot of the code. It was a bit sloppy since I am new to this, but the end product works flawlessly.

At first the JSON calls were not restricted in any way. Recently Google deprecated that API. It can still be used but through a different portal and you are only allowed 100 requests per day.

It originally was made as an aid to preparation for the Spartan Spelling Bee. The limit of 100 requests per day, defeats this purpose. But it was an enlightening experience.

Click here to download the Project

Contact me through Facebook for the source code or explanation.

Moto G 16 GB Review

Sunday, March 23rd, 2014

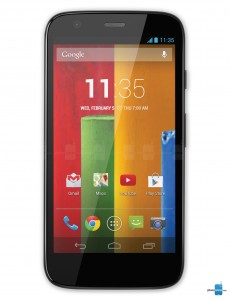
Motorola-Moto-G-0


To start off, I recently bought a Moto G 16 GB from flipkart. Its only available in India through flipkart, so I had no alternative. The waiting time was supposed to be 10 – 20 days, but I got mine delivered in less than 5. So my experience with the Moto G started off pretty well.

The Packaging:

On opening the box, I first noticed that the charging cable is not modular. You can’t remove the USB part from the power plug part and use it to connect the Moto G to your PC. You’ll have to purchase a separate data cable to connect the Moto G to your PC. There is a wired headset besides the usual warranty card and other manuals.

Looks and Aesthetics:

The phone has a slightly pillowed shape. The front has the in- call speaker at the top along with the front camera and the proximity sensor but other than that it is plain with no hardware buttons. On the right side, you have the screen lock button and the volume controls. The top of the phone has the 3.5mm headphone port placed dead center as opposed to one side. The bottom has the micro USB port also placed at the center. The back has the speaker, 5 Mega Pixel camera and the LED flash. The small Motorola symbol is placed just below the flash and is concaved inwards. I can’t see any reason for this dimple, but you can rest one of your fingers on it when using the camera so that you don’t block the Flash. You can also buy interchangeable back covers for the Moto G. There are a lot of colors to choose from, which is a nice addition.

images

First run:

On powering up the phone for the first time it asks for your Google account info and all that regular stuff. The setup is fairly straight forward. The Motorola Migrate app takes care of moving all your apps from your old Androd smart phone to your sparkling new Moto G.

The Screen:

The screen is crystal clear. A definite step up from my previous phone. A resolution of 1280 X 720 in a 4.7 Inch screen gives you a pixel density of 329 ppi. Which is really impressive. Text is clear and light on the eyes. Images are sharp and  bright. Inbuilt wallpapers are amazing to say the least.

Under The Hood:

A quad core Qualcomm Snapdragon CPU 400 clocked at 1.2 Ghz keeps applications running smoothly whereas the Adreno 305 GPU keeps games chugging at constant pace. You get  1 GB of RAM which is not bad. You’ll never feel that the phone is sluggish unless there is a lot of background processes running. For most purposes including gaming, the phone performs exceptionally well.
A – GPS and GLONASS support along with Google Maps ensure you’ll never get lost. Provided you have your Moto G with you.

The Camera:

The 5 Mega Pixel Primary Camera and the 1.3 Mega Pixel front facing camera are decent. The rear camera has an LED flash with Auto Focus. It captures images at 2592 х 1944 pixels. The quality is good in sunlight and illuminated areas, but they turn out grainy when the lights go out. The LED flash helps, but doesn’t do that much good. Its handy when there is absolutely no light around, but it doesn’t enhance pictures taken at low  – below idea lighting conditions. HDR is a nice addition, and is useful most of the times. HDR doesn’t give you grainy images unlike the LED flash.
Video recording at 720p is decent as well. Slow motion recording at 120 frames per second is a nice addition.

The Operating System:

The phone ran Android 4.4.2 KitKat out of the box. The interface is clean with no frills. Simple enough to use once you get the hang of it. Some things could have been more obvious than others. For example switching on data connectivity is kinda hidden inside layers of menus. Other minor niggles exist but I’m nitpicking here.

The Battery:

One of the killer plus points of the Moto G. A 2070 mAh batter may seem average, but the amount of time you can eke out from it is astonishing. This phone can last almost 2 days on a full charge. It takes 3 hours to go from 0% to 100% charge and two days to go from 100% to 0% in medium usage.
I used the phone from 4 AM to 12 PM with constant WiFi or 2G connectivity. At the end of the 20 hour run, I was left with 40% battery left. Which is amazing to say the least. The battery is non removable though.

Miscellaneous features:

You get 50 GB of Google Drive space free for 2 years, besides the 2 GB you already get. It should come in handy when you need to back things up.
You have Quickoffice to make presentations, and reports. Some basic word processing can also be done.
The Speaker is clear even at high volumes.
Dual SIM standby works as advertised.

Minor inconveniences:

Never place your finger on the flash when taking a photo with the flash on, the flash get incredibly hot when it lights up.
Slightly heavy.
No native video calling. This feature isn’t present on most phones, but the Samsung Galaxy range has it and I don’t see why the Moto G shouldn’t have it.
No expandable memory.

Camera pictures:

Low Light.   : IMG_20140317_175601878

Low Light. HDR : IMG_20140317_175604791

Low Light. Flash :IMG_20140317_175613140

Low Light Flash : IMG_20140316_232430749

Indirect Sunlight HDR: IMG_20140317_175532554

Direct Sunlight: IMG_20140323_085903047_HDR

Direct Sunlight : IMG_20140323_085743201_HDR

As you can see. In pitch dark conditions, you are better off using flash. But in all other situations the exposure control and HDR should be the better option.

Photos taken in direct sunlight are quite good, at least for a 5 MP camera.

My Verdict:

If you are on a budget, then you cant go wrong with the Moto G. This has been Motorola’s highest selling phone till date, and with good reason.
For the asking price, the Moto G gives you amazing value for money.
The Moto G only loses when compared with phones priced much higher than itself.

If you are considering buying a phone within this price bracket and can bear with its minor inconveniences, then the Moto G would be the best option.